
How to create a Detector Rails in Minecraft?
Well, there are a number of items, tools or other stuff that you can certainly add to your gameplay in Minecraft. All these things do have different implications and uses just like the way we use them in our real worlds. As you may have also experienced in the Minecraft gameplay itself, it does have a lot of things in common with our real world. Everything here works in the same manner as they do work in the real outside world.
The developers have tried really hard to make a virtual living world that resembles our real outside world in a number of ways. And they have really done a commendable job in making a quite similar replica of the various geographical features of the real world.
Now, as we have the railway network that allows us to transport and move various items from one place to another in the real world. There are rails that you can add to your respective gameplay in Minecraft. Rails are one of the many that you can use in Minecraft to move the required items or stuff from one place to another. If you wish to add rails to your respective Minecraft gameplays then this article is certainly gonna help you in achieving so.
In this article given below, we will be following the respective way of creating the detector rail in Minecraft. So do follow this article to the very end in order to get the whole thing done.
You cannot actually add the detector rails to your gameplay by finding them in some other cities or dimensions, just as you find and collect the various other items in Minecraft.
Instead of that you can actually create or craft the detector rails inside the crafting table by combining the various required elements together.
Before we move towards the process of creating the detector rails in Minecraft, let us consider the varying editions of Minecraft that do support the detector rails feature in Minecraft.
The editions of Minecraft that do support the detector rails feature in the Minecraft gameplay are;
Java Edition
Pocket Edition- 0.13.0
Xbox 360
Xbox One
PS3
PS4
Wii U
Nintendo Switch
Windows 10 Edition- 0.13.0
Education Edition
So these were the editions of Minecraft that allow you to create detector rails in the Minecraft gameplay.
Now moving onto the actual process of creating detector rails in the crafting table, we have;
Opening the crafting table
As we said earlier, the process of creating detector rails in the gameplay doesn’t force you to roam the various points of the world in order to collect it from there.
There may be some other ways of creating detector rails in Minecraft, but the process of crafting it inside the crafting table is one of the most fun and sought after ways of doing so.
A crafting table is like a machinery or furnace in the Minecraft gameplay that combines various required elements in a certain definite order to produce the final product.
The very first step of creating detector rails in the gameplay, is to open the crafting table in the very first place.
You need to perform the respective steps or gestures in the different editions of Minecraft for opening the crafting table there.
- Follow the required steps or gestures in your respective device or editions of Minecraft for opening the crafting table.
After you have followed the ascertain steps or gesture in your respective device, you will notice that a rectangle shaped window appears on your Minecraft screen.
There, you will see that the crafting table has two respective sections in it. The two sections of the crafting table are associated with different functions and roles.
The first section of the crafting table is where you place the required items in a certain specific order for collecting the final product.
The other section of the crafting table is where you get to collect the final product after the process has been completed.
The first section consists of a square box that contains nine similar blocks inside it. These blocks are arranged in a certain order so that they form a square of length equal to that of three blocks.
The other section contains just a single box that holds all of your produced results inside it. Whether you get a single result or number of results, they all feature inside that single block in the crafting table.
So that was about opening the crafting table in the Minecraft gameplay.
Now that you have opened the crafting table in the Minecraft gameplay, it’s time to know the list of various required items for producing detector rails there.
Whenever we talk of the crafting table in Minecraft gameplay, an image of different elements arranged in a certain order does come up in our minds.
The required items for creating detector rails in the crafting table are:
- 6 iron ingots
- 1 Redstone dust
- 1 stone pressure plate
So you will be needing 6 iron ingots, 1 Redstone dust, and a stone pressure plate for creating detector rails in the crafting table.
Arranging the Items
Here, you need to get one thing straight about the process of creating detector rails in Minecraft. You cannot certainly obtain a definite result in the crafting table without arranging the required items in a certain order.
There is a specific order of arrangements of the required items in the crafting table for getting an ascertain result.
You need to follow the exact same order of arrangement as described below for successfully creating a in the gameplay.
- You need to arrange the 6 iron ingots, 1 Redstone dust, and a stone pressure plate in such a manner that the three iron ingots occupie the first, second, and third position in the first column, the stone pressure plate and redstone dust occupie the second, and third positions in the second coulmn, and the remaining three iron ingots occupie the first, second, and third position in the third column if the square box in the crafting table.
Or,
Place the two iron ingots on the first and third position in the first row, two iron ingots and a redstone dust on the first, third and second position respectively in the second row, and two iron ingots and a stone pressure plate on the on the first, third and second position respectively in the third row of the square box in the crafting table.
In other words,
You need to Place the two iron ingots on the first and third position in the first level, two iron ingots and a redstone dust on the first, third and second position respectively in the second level, and two iron ingots and a stone pressure plate on the on the first, third and second position respectively in the third level of the square box in the crafting table.
So these were the respective order of arranging the 6 iron ingots, 1 Redstone dust, and a stone pressure plate in the crafting table of the Minecraft gameplay.
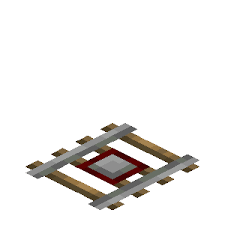
After you have successfully placed the required items in a definite manner inside the crafting table. You will notice that the detector rail has appeared inside the last section of the crafting table.
Here, you have successfully created the detector rails in the crafting table.
The detector rails that you had created would be present inside that single block of the crafting table.
Now that you have created the required detector rails in the crafting table, but you would not be able to use it in your gameplay as you haven’t added it there.
So that was about producing the detector rails in Minecraft.
Adding the detector rails
This is the last step of the process of creating a detector rail in the Minecraft gameplay.
You cannot possibly access a certain product that you have created in the crafting table unless you add it to the inventory in Minecraft.
You need to follow the required step or gesture in your respective edition of Minecraft for adding the created detector rails to your inventory.
- Follow the required steps or gestures in your respective edition of Minecraft for placing the detector rail in the inventory.

Here, you have successfully added the detector rails to your gameplay in Minecraft.
Now, you will be able to access these detector rails inside the bar, present on the bottom of the Minecraft screen.
There is another way of creating the detector rails in Minecraft by using the summon command method in your respective Minecraft gameplay.
The summon command allows you to summon or call for a creature or other items in the Minecraft gameplay. You can use the formula associated with a certain tool or animal for calling out that animal.
By summoning the animal or creature in the gameplay, you actually demand or request the Minecraft to supply you that animal or creature.
The formula for calling or adding the detector rails in your gameplay is;
/summon @p detector rails 1 0

Now that you have known the respective command for adding a detector rails to your gameplay then it’s fine to type the detector rails there and finish the process.
First of all, you need to open the chat window in your respective editions of Minecraft for typing the required command there.
Follow the required steps or gestures in your respective editions of Minecraft for opening the chat window there.
After you have opened the chat window in your respective devices, you need to type the required summon command there for adding the detector rails in the gameplay.
Press the Enter key in your respective devices or editions of Minecraft for confirming the required command.
Here, you have successfully placed the summon command for adding the detector rails into your gameplay.
Thereafter, you will notice that the detector rails has been successfully added to your inventory in the gameplay.
Now, you will be able to access this crack stone brick inside the bar, present on the bottom of the Minecraft screen.
So that was all about creating the detector rails in Minecraft.
Follow the links given below for getting a similar guide to the various processes related to adding the items, tools, or features in the Minecraft gameplay.