
How to make a Beehive in Minecraft?
Minecraft gameplay is all about creating different kinds of designs, structures, Settlements, and much more. The interesting part of the Minecraft gameplay is that you can actually create these items or tools in the gameplay itself by following the respective process there.
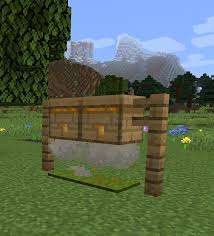
One such really adoring item inside the Minecraft gameplay is the beehive that you can add to the inner wall of your shelter in Minecraft. The beehive is considered a really unique and loving decorative item in the whole Minecraft gameplay.

In this article given below, we will be following the respective ways of creating or adding the beehive to your gameplay there. So do follow this article to the very end in order to get the whole thing done.
When it comes to creating the beehives in the Minecraft gameplay then you don’t really have to roam around the respective overworld biomes in Minecraft to collect a beehive from some city or dimension, nor do you need to steal it from a settlement or player by killing it there.
Rather, you can actually create the beehive in the crafting table by merging the various required elements in a definite order there.
Let us consider the editions of Minecraft that do support this process that we are going to follow.
The varying editions of Minecraft that do support the process if creating the beehive are;
Java Edition
Pocket Edition
Xbox 360
Xbox One
PS3
PS4
Wii U
Nintendo Switch
Windows 10 Edition
Education Education
So these were the respective editions of Minecraft that allow you to create the beehives in Minecraft.
Now, moving to the actual process of creating the beehives in Minecraft, we have;
- Opening the craft table
The very first step of the process of creating or adding the beehives in the crafting is to actually open the crafting table in the first place.
The crafting table acts as a kind of machinery in Minecraft that collects all of the required elements provided by you in a specific manner and gives out the desired results at the end of the process.
Though, there is a limit to producing the items and tools in the crafting table, still you can create a large number of items and tools in there.
The very first step towards adding or creating the beehive inside the crafting table, is to actually open it at the very first place.
You might need to follow some different gesture to open the crafting table in your respective editions or devices. As every device has a different module and setup of working the same thing.
- Follow the respective step or gesture in your edition of Minecraft to open the crafting table.
How to make a Beehive in Minecraft?
After you open the crafting table in your respective editions of Minecraft, you will notice that the crafting table has a clear rectangle form.
The crafting table is divided into two separate parts that have different working and function. The first part is the input one, where you need to place the required items for getting a product. The other part is the output part, where you get to collect the finished product after the completion of the process.
The input part consists of a single square box that has nine similarly shaped blocks inside it. These nine blocks are arranged in three columns and three rows, forming a square of length three blocks.
On the other hand, the output section has a single block that lies on the center of the output part.
This single block holds all of your produced items inside it, whether you create a single item or various other multiple items.
So that was all about opening the crafting table in Minecraft.
Now that we have opened the crafting table, let us consider the elements of Minecraft that we will be requiring in the next step to create the beehives.
The required items for creating the beehives in the crafting table are;
- 6 wood planks
- Three honeycombs
The required 6 wood planks are not supposed to be of any particular kind, you can choose any kind of the wood planks for creating a beehive in the Minecraft gameplay. You can choose the Acacia wood planks, oak wood planks, warped wood planks, dark oak wood planks, jungle wood planks, spruce wood planks, birch wood planks, or any other wood planks.
So, you will be just needing the 6 wood planks and three honeycombs in your respective gameplay for creating the beehives.
- Arranging the items
Now that you have opened up the crafting and known the required items for creating the beehive in Minecraft.
It’s time that we finish this important step of arranging the required items to produce the beehives in the crafting table
It is really important as well as essential for arranging the required items in a correct manner for creating the beehives in the crafting table.
You need to arrange the sand blocks in a certain or definite manner that will produce the beehives there.
Here is something that you should be aware of while areanging the required items in the crafting table, there is a fixed manner of arrangement for obtaining a particular product in the crafting table.
You would not get anything from the crafting table, if you do not arrange the required items in the right manner.
Follow the exact manner of arrangement of the sand blocks for creating the beehives in the crafting table;
- You need to place the 6 wooden planks and the three honeycombs in such a way that the three wooden planks acquire the first, second, and third position in the first column, and the three honeycombs acquire the first, second and third position in the second cloumn, and the remaining three wooden planks acquire the first, second, and third position in the three column of the square box in the crafting table.
Or,
You need to place the two wooden pkanks and a honeycomb on the first, third, and second position in the first row, the two wooden pkanks and a honeycomb on the first, third, and second position in the second row, the two wooden pkanks and a honeycomb on the first, third, and second position in the third row of the square box in the crafting table.
In other words,
place the two wooden pkanks and a honeycomb on the first, third, and second position in the first row, the two wooden pkanks and a honeycomb on the first, third, and second position in the second row, the two wooden pkanks and a honeycomb on the first, third, and second position in the third row of the square box in the crafting table.
As you have successfully placed the required items accordingly in the crafting table, the beehives will appear inside that single block in the output section of the crafting table.
Here, you have acquired the beehive in the output section of the crafting table.
But the process isn’t finished yet, as you haven’t added the beehive to your gameplay.
- Adding the beehive
Now that you have finally created the beehive in the crafting table, it’s time that lyou add the beehive to the inventory.
This is the last step of the process of creating the beehive in Minecraft.
You would not be able to use the beehive to build some structure or design in your gameplay, if you did not add it to the inventory.
- Follow the respective step or gesture in your edition of Minecraft to add the produced beehives by dragging them from the output section of the crafting table to the inventory.
Here, you have successfully added the beehive to your gameplay in Minecraft.
Now, the beehive will be visible to you in the bar, present on the bottom of the Minecraft screen in your respective devices.
So that was about creating the beehive in Minecraft.
That was one heck of a way of creating or adding the beehive to your gameplay in Minecraft.
While you can also request the Minecraft gameplay for crafting a beehive to your respective gameplay by using the summon command method.
The summon command allows you to summon or call for a creature or other items in the Minecraft gameplay. You can use the formula associated with a certain tool or animal for calling out that animal.
You actually call out or request for the beehice in the Minecraft gameplay by placing the required summon command there.
The formula for calling or adding the beehive in your respective device or edition of Minecraft does differ from each other.
/summon @p beehive 1 0
Now that you have known the respective command for adding a beehive to your gameplay then it’s fine to type the beehive there and finish the process.
First of all, you need to open the chat window in your respective editions of Minecraft for typing the required command there.
- Follow the required steps or gestures in your respective editions of Minecraft for opening the chat window there.
After you have opened the chat window in your respective devices, you need to type the required summon command there for adding the beehive in the gameplay.
- You need to press the Enter key on your respective device or edition of Minecraft for confirming the action of adding the beehive to the gameplay.
Thereafter, you will notice that the beehive has been successfully added to your inventory in the gameplay.
Here, you have successfully placed the summon command for adding the beehive into your gameplay.
Now, you will be able to access this beehive inside the bar, present on the bottom of the Minecraft screen.
So that was all about creating the beehive in Minecraft.
Follow the links given below for setting some similar guides on various topics related to adding items, tools or features in Minecraft.