
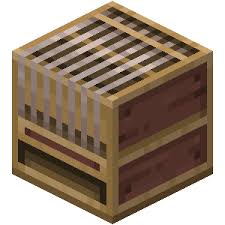
Well, you may have moved on to this after seeing some awe inspiring loom transitions into a designed banner. Well, loom also has a lot of other uses in Minecraft but the most most used and most surprising one is crafting a banner.
Looms are a real delight for all the interior experts and creative geeks in Minecraft. Who knows what is the limit to which you can design banners and other stuff with the help of a loom.
We may not know the limit to crafting these cool and fantastic designs but we may at least get to know some of them.
How to Make a Loom in Minecraft?
So let’s begin this journey of crafting a loom.
You can easily craft a loom in Minecraft by using the crafting table.You just need to add various things in a certain order. And the result appears before you.
Before we head on to the process of crafting the loom, let us consider the editions of Minecraft that support the process of adding looms to your inventory in Minecraft gameplay.
These are the editions that you can use to add the loom to your gameplay in Minecraft.
Java Edition(PC/Mac) – 1.14.0
Pocket Edition- 1.10.0
Xbox One-1. 10.9
PS4-1.9
Nintendo Switch-1.10.0
Windows 10-1.10.0
Education Edition-1.12.0
So these are the editions of Minecraft that support the process of adding loom to your inventory in Minecraft gameplay.
Now that we have known the versions and editions that support the loom feature in Minecraft, let us move to the process of adding it.
There are some other things as well that you need to know before moving to the process. The process of crafting looms will require you to add various items to the table, so as to obtain the desired result.
Required items
The process of crafting looms will require you to add various items onto the crafting table for producing the final result.
These items are- wooden planks and strings.
Specifically, you will need 2 wooden planks and 2 strings, that too in an appropriate and specific manner, to produce a loom.
So, you will need-
2 wooden planks
2 strings
Now, talking of wooden planks, you can use any kind of wood plank, that can be crimson plank, dark oak plank, birch plank, spruce plank.
Moving to the process of creating looms. The very first is the Opening Craft table.
- Opening craft table
The crafting table is an easy and most sought to do process of crafting various things. Well, it gets even more interesting as we are involved with looms. Now this time we are actually crafting looms, so the thoughts and inspiration of further crafting with the help of looms will take us to the final process.
Follow the respective action or gesture for opening the crafting table in your device.
After you have opened the crafting table, you will see that the crafting table consists of two separate segments.
The crafting table is divided into a final and an initial part.
In the initial part you have a box consisting of 9 blocks, which are grouped together to form a square. The initial box contains 3 columns and 3 rows, forming a 3 block length square.
And the final part, consists of a single block, that represents the final product.
That was all about the crafting table.
Moving to the important step of our process, we have- arranging the items.
- Arranging the items
Now that you have opened the crafting table l, it’s time to arrange the required items for crafting a loom altogether, so as to get a finished product.
You will need to arrange the 2 strings and 2 wooden planks in a exact manner given below. Or else you would not be able to produce a loom in the crafting table
First of all, place the 2 strings in the first and second position in the first row of the square shaped creating table, containing 3 columns and 3 rows.
Then on, place the two wooden planks in the first and second position in the second row of the crafting table.

The arrangement will look like placing the two string in first and second positions of the first layer, and the two wooden planks placed in the first and second position of the second layer.
After you place the required items in the similar manner in the crafting table, you will notice after a second or so that the loom has appeared inside the block in the final segment of crafting table.
Now that you have successfully crafted a loom in the crafting table, you are good to use it in other crafting tables for making some fascinating designs.
Still you need to wait for a moment to use the loom for making various other attractive designed materials in Minecraft.
The last step involves placing the the finished product into the inventory of your gameplay in Minecraft.

You need to place the loom directly onto the inventory of your gameplay. After that you will see it appear in the below given bar on your Minecraft screen.
Here you have successfully acquired the loom in Minecraft.
So, that was all about crafting a loom and adding it to your inventory in Minecraft.